Recently released for free download and use and announced in the January 2014 Pirate101 newsletter, I finally finished a big Minecraft project of the year with tons of support and help- especially from my friend Adrian Silver, the famed mapper of Pirate101 locations, who built a lot of the map. Making a full-scale map of anything that's been recreated from somewhere else is a big undertaking- bigger than most people think! Here's how I went about doing it and how you can make a map from Pirate101, too.
Plan Your Map
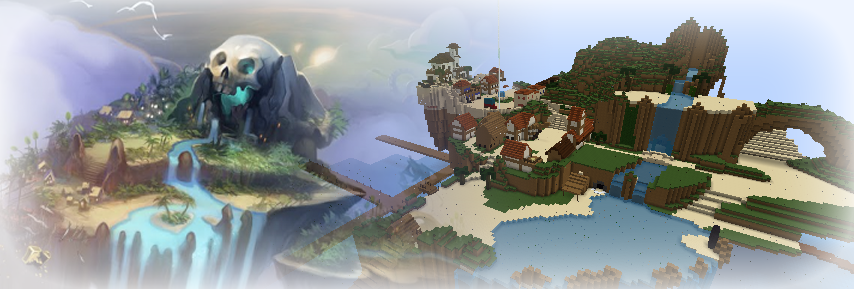
This is the most important step. I knew I wanted to make something more to go with my Marleybone galleon. I logged on to Pirate101 and scouted the different worlds. I wanted to find a place that would be relatively easy to make, but would still showcase a bit of effort. This meant finding someplace that didn't have a lot of buildings at an angle (that immediately ruled out Flotsam!), and a place that could be recognizable in a game like Minecraft. I settled on Skull Island.
Prepare Your Materials
In this step I needed to pick out a good texture pack for Minecraft that would make the map look as pretty as possible and hold true to the original look and feel of the area in the game. I settled on Steelfeathers' Enchanted Pack, which I used for my galleon, for its old-timey feel and rustic colors. There are tons of texture packs out there- just make sure you always download from the official Minecraft forums and NEVER anywhere else. It's very easy to put viruses and other nasty stuff in Minecraft downloads!
Take Measurements
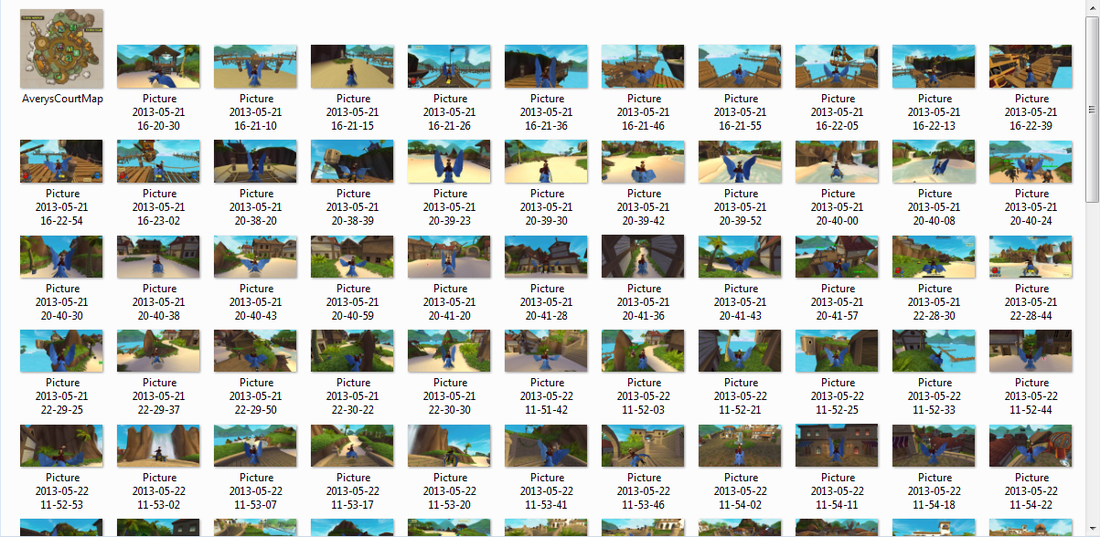
Once I had chosen my texture pack, it was time to prepare some reference pictures. These are just screenshots of various parts of the island.
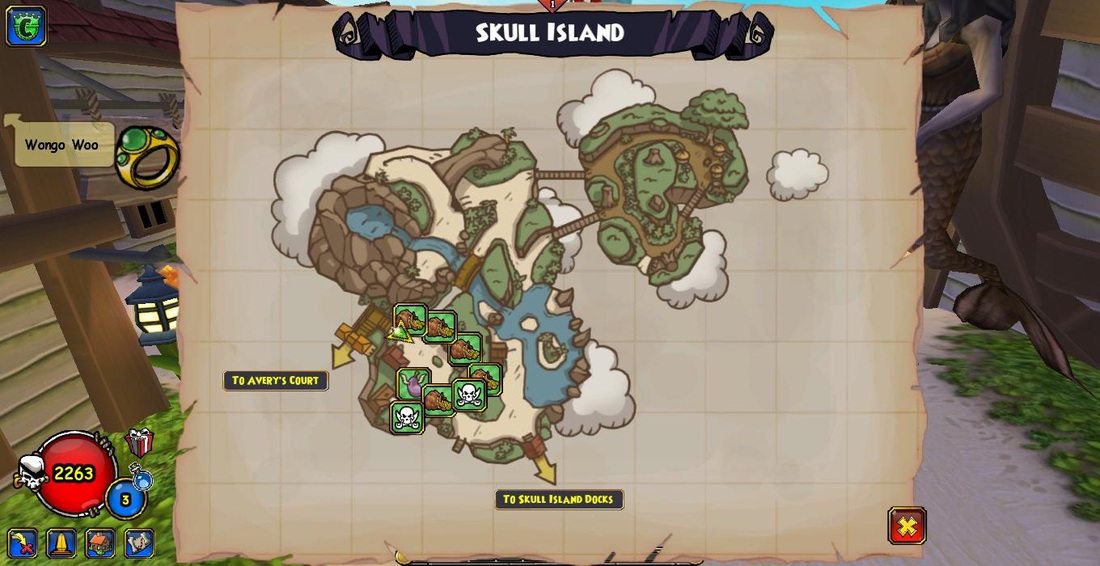
These pictures are extremely important, because they're what you look at while you're building in Minecraft. You'll want to take pictures of anything and everything. And I mean EVERYTHING- from buildings on all four sides to small objects randomly placed in the area. If you take about 10 steps in a single direction in the game, you can easily take 4 or 5 screenshots. You will also want to screenshot the map of the zone you're in to make sure you get the overall shape of the area correct.
Take pictures of anything that looks interesting. Take pictures of buildings both up close and far away. Get on a tall mount and get shots from a different perspective. I did a lot of looking at walls and investigating how buildings looked from over the wall, like in Avery's Court looking over the shops below.
I ended up taking 144 screenshots of Skull Island!
Set Up Your Map
This may seem like a straightforward step that doesn't require much explanation, but there is a good method that I eventually discovered for making the map as accurate as possible.
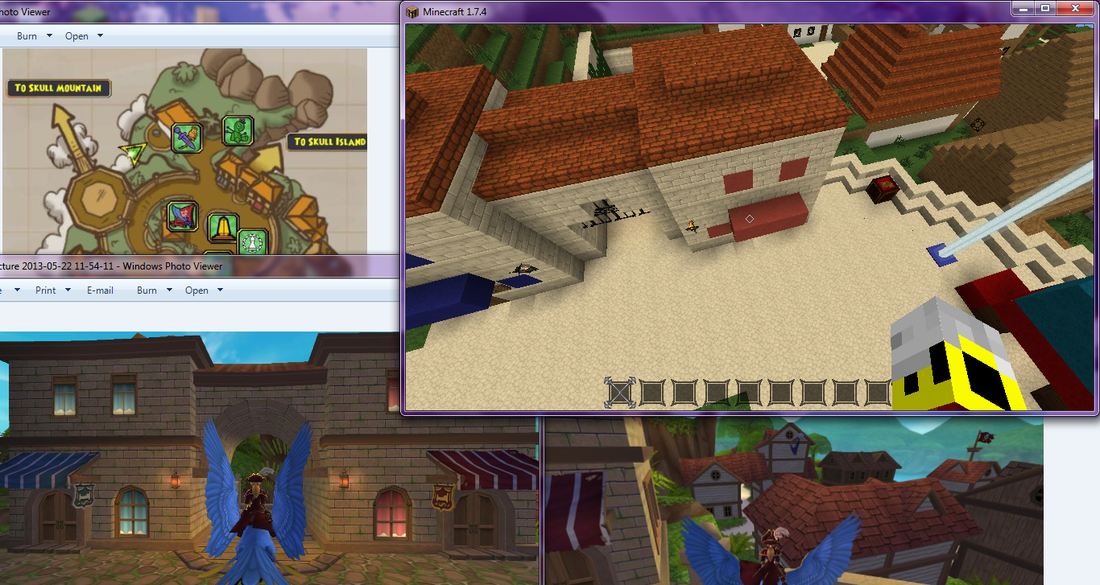
Start by pulling up your map screenshots. Put it in a window next to your Minecraft screen so that you don't have to click in between the two, because that takes a ton of time and just gets annoying. If your screen isn't wide enough, adjust your Minecraft window size or work on little sections at a time.
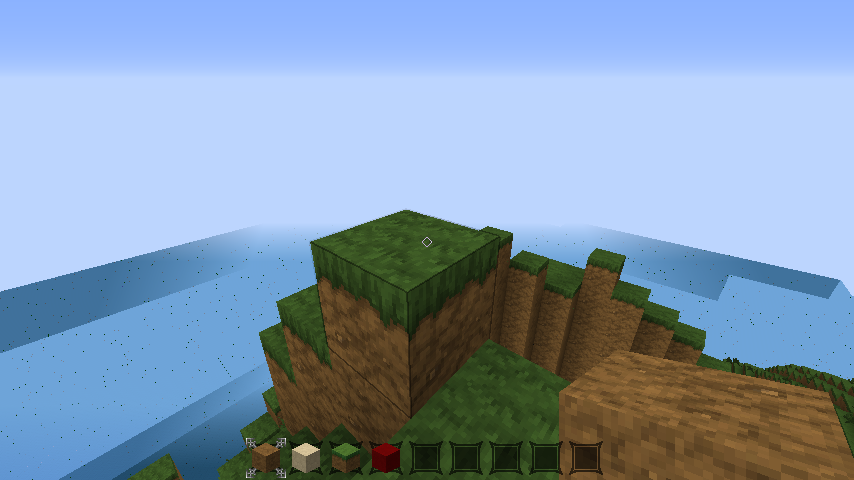
Make a new map in creative mode. I used the Superflat mode and made it an endless ocean. You can do whatever you wish- just make sure you are in creative mode and superflat mode with village spawns and bonus chests turned off. Lots of randomly generated terrain and objects will get in the way and distract from what you're trying to build.
Start by pulling up your map screenshots. Put it in a window next to your Minecraft screen so that you don't have to click in between the two, because that takes a ton of time and just gets annoying. If your screen isn't wide enough, adjust your Minecraft window size or work on little sections at a time.
Make a new map in creative mode. I used the Superflat mode and made it an endless ocean. You can do whatever you wish- just make sure you are in creative mode and superflat mode with village spawns and bonus chests turned off. Lots of randomly generated terrain and objects will get in the way and distract from what you're trying to build.
Build!
Start placing blocks, making it as close to real size as possible. Use your other screenshots for this part. This will require lots of switching between different screenshots or just opening a bunch of them up at once. I have never really found a good way to get around this time-consuming part without having a second computer right next to me and transferring files over DropBox, which could potentially take unnecessary time.
Once you have done a sizable area, fly up into the air and double-check your work against the zone's map. This is simply to ensure that you're getting the shape of the land masses correct. You're bound to make a few mistakes here and there- I made a ton! Just keep at it and remember that the more attention to detail you give, the better your end result.
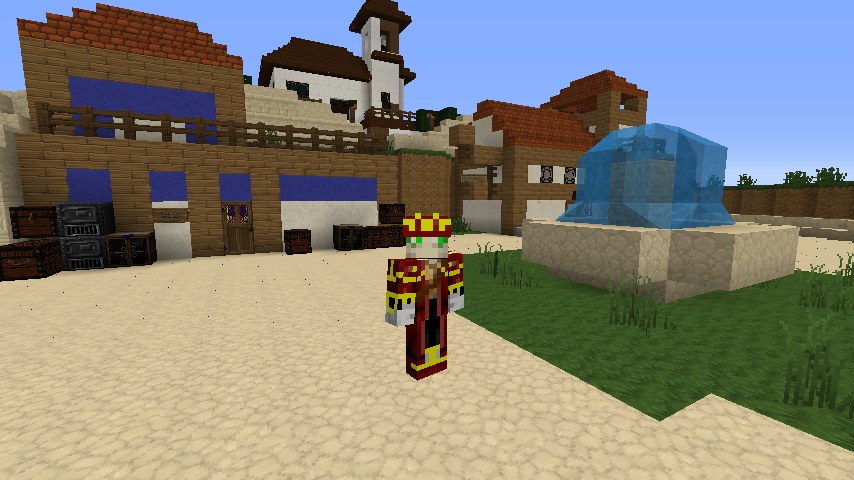
Keep in mind that it is very easy to scale your map to your Minecraft character. Take screenshots of your Pirate standing next to various objects to get a good idea of how big things are. You might find that it's rather easy to make things to scale, even though you're just using giant blocks.
This is a really long step. If you're making a larger zone like Skull Island, expect to take a month or so, depending on how motivated you are and how much time you spend on it every day. I got much of my screenshotting and the basic building done in three 8-hour sittings. Much of the detailing like the large rock arch (on the east side of the map) and buildings took much longer and were done in shorter periods of around 2-5 hours at a time with Adrian.
Don't be afraid to ask friends for help! There are lots of online guides for easily setting up your own server to invite friends to help you. If you have friends in real life, invite them to bring their laptop over for an afternoon and open a LAN (local area network) connection and work on it together. I ended up feeling overwhelmed and invited the talented Minecraft mapper Adrian Silver to help me, and he contributed a lot to the map, including much of the volcano, the building interiors, Avery's house and the decorations like portals and the minigames wagon. Things go so much faster with friends!
Once you have done a sizable area, fly up into the air and double-check your work against the zone's map. This is simply to ensure that you're getting the shape of the land masses correct. You're bound to make a few mistakes here and there- I made a ton! Just keep at it and remember that the more attention to detail you give, the better your end result.
Keep in mind that it is very easy to scale your map to your Minecraft character. Take screenshots of your Pirate standing next to various objects to get a good idea of how big things are. You might find that it's rather easy to make things to scale, even though you're just using giant blocks.
This is a really long step. If you're making a larger zone like Skull Island, expect to take a month or so, depending on how motivated you are and how much time you spend on it every day. I got much of my screenshotting and the basic building done in three 8-hour sittings. Much of the detailing like the large rock arch (on the east side of the map) and buildings took much longer and were done in shorter periods of around 2-5 hours at a time with Adrian.
Don't be afraid to ask friends for help! There are lots of online guides for easily setting up your own server to invite friends to help you. If you have friends in real life, invite them to bring their laptop over for an afternoon and open a LAN (local area network) connection and work on it together. I ended up feeling overwhelmed and invited the talented Minecraft mapper Adrian Silver to help me, and he contributed a lot to the map, including much of the volcano, the building interiors, Avery's house and the decorations like portals and the minigames wagon. Things go so much faster with friends!
Finishing touches
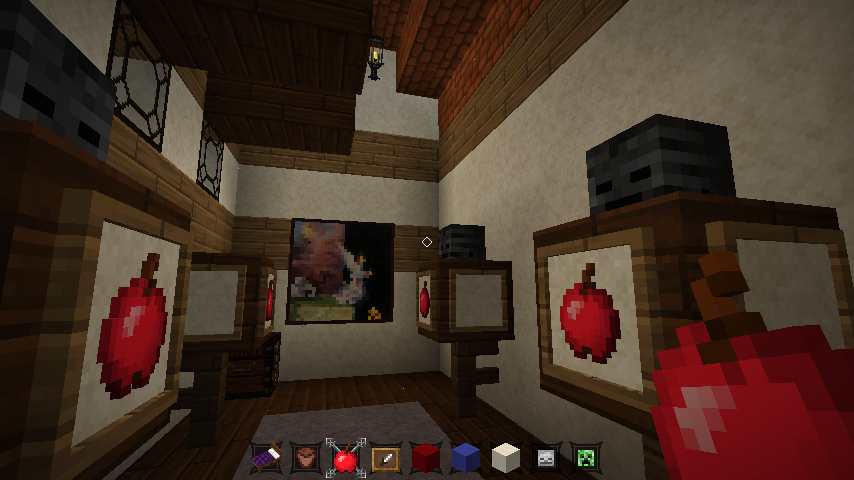
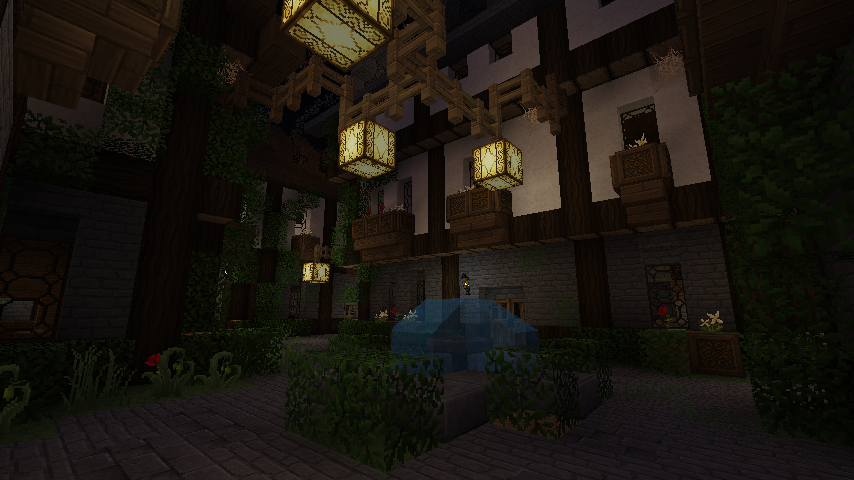
Once you are done with the terrain and buildings, you can add the smaller details and give your own personal touch. This is where you'll add trees, signs to label buildings (if you want) and things like chests to hold objects in the place of shopkeepers and other NPCs. Adrian did a lot of details on the insides of buildings.
You will find that in every area of Pirate101, the buildings are different shapes and sizes on the inside than on the outside. I wouldn't stress too much about this. Just do your best, and if you'd like, allow the player to climb down a ladder so that you can build the full interior below-ground. Take note of skulls on the ground, bits of fences and other small details to make your map stand out.
You will find that in every area of Pirate101, the buildings are different shapes and sizes on the inside than on the outside. I wouldn't stress too much about this. Just do your best, and if you'd like, allow the player to climb down a ladder so that you can build the full interior below-ground. Take note of skulls on the ground, bits of fences and other small details to make your map stand out.
(optional) Distribute Your Map
The fastest way to get your map out to other people is to put it up for download. This will require putting together a package of things for other people so that your map is fully usable.
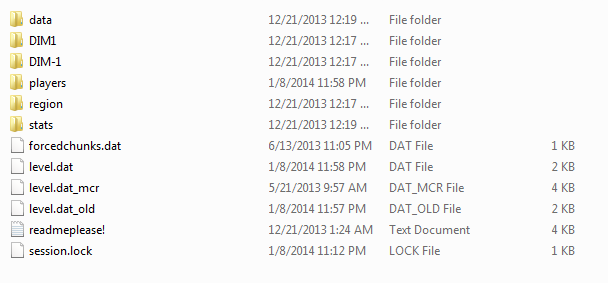
First, create a new folder somewhere on your computer (the desktop is probably the easiest) and name it after your map. I like to include that it was made by me. My folder is called "Skull_Island_V1_by_peachyprune" (that's my Minecraft name). Inside this folder, copy your entire map folder (found either by searching "%appdata%" and navigating to your minecraft folder and then to the saves folder or on your server's folder if you opened up your map to others over the internet, not including LAN connections, at any point in the creation process) and put it in your package folder.
Next, create a new Notepad document by right-clicking inside the package folder window and choosing to make a new text document. This will be your readme file. Write it however you want, including what users can and cannot do with your map, and include any special instructions for your users so that they can get the best experience out of your map. I wrote instructions for how to make the correct texture pack work since I used a very old texture pack. You can start from scratch or use the template I have provided below. The green text are simply my notes for your reference. Take those parts out when you put your readme together.
Put the name of your map and who it's by at the very top of your document. Write the current date so your users know when your readme was last updated.
Skull Island V1.0 by peachyprune (AKA Beatriz Abbott) | 21 December 2013
Start with a note to all users- this means everyone who opens up your map and uses it in Minecraft. You will put your special instructions here. Don't be afraid to post links to the Minecraft forum or wikipedia when mentioning specific files or web pages. Your users will appreciate it!
____________________________________________________________
NOTE TO ALL USERS
To get the best experience out of this map, I strongly recommend you download and use Steelfeathers' Enchanted Pack, which is available through the link below. Thanks! :)
http://www.minecraftforum.net/topic/479158-32x15-steelfeathers-enchanted-pack-updated-316/
For more info on converting texture packs into resource packs, please refer to the link below:
http://minecraft.gamepedia.com/Resource_pack#Texture_Packs
This section is for crediting sources of inspiration (KingsIsle, in this case). You can easily credit KI by copying what I wrote and replacing the name of the area you mapped.
____________________________________________________________
TERMS OF USE
- The original Skull Island concept and design belongs to KingsIsle Entertainment, Inc.. This is a work of fan art and the creator (me) is collecting absolutely nothing for the creation or distribution of this Minecraft map. If you paid for this map, you obtained it from an illegal source!
For more information on KingsIsle Entertainment, follow the link below:
http://www.kingsisle.com/
For mroe information on the game from which Skull Island came, follow the link below:
https://www.pirate101.com/
If you're ok with people making videos of your map, copy this section into your readme and change the 'her' to 'his' or 'ze' if necessary. If you aren't ok with people making videos of your map, tell them so.
- You can make a video of the content of this map if you are not a youtube partner or any kind of commercial partnership. If your are a youtube partner or any kind of commercial partnership, you need a written agreement from the owner of the map.
- If you publish a video using this map on a video hosting site (such as YouTube, or Dailymotion ..),
you must put a direct link leading to this post in the video description and direct link leading to the original page of the map:
and if an existing YouTube video by the owner has already been made, this must be linked to as well.
- If you publish a video using this map on a video hosting site (such as Youtube, or Dailymotion. etc),
you must credit the owner in the video and in the video description Linking to her personal site and Youtube account.
If you're ok with people putting your map up on a server, copy this section. If you aren't ok with people using your map on a server, tell them so.
- You can use this map on a Minecraft server
Tell users how they can distribute pictures of your map and copies of the map itself. If you don't have a personal site or youtube account, leave that part out.
- If you publish a picture using this map on a website or any media sharing system,
you must credit the owner in the picture itself and if possible, in the description of the picture linking to her personal site and Youtube account.
- If you share this map on your website, blog or whatever else you use,
you must put a direct link leading to this post and use the original dropbox download link:
If you don't want people changing your map and redistributing it or using it in other downloadable packs, tell them so here. If you are ok with others changing your map freely, leave this section out.
- You cannot reuse the content of this map in other packs, or modify its content or redistribute its content without the explicit permission from the owner.
- You cannot upload the original map on another file hosting website and redistribute it.
It is strongly recommended that you put this in your readme towards the end! This warns your users that they are responsible for knowing the latest version of your terms of use.
- The Owner reserve the right to change this agreement at any time with or without notice,
with immediate and/or retroactive effect.
Include this section if you included personal sites, youtube accounts or other contact info and locations. You can include whatever site addresses you want, but be sure to not include phone numbers or email addresses (unless you have a safe, monitored email address devoted only to managing your minecraft maps and you don't put ANY personal info anywhere in the email account!)
____________________________________________________________
Links to post in the credit and for contact :
personal site:
http://simpleswashbuckler.weebly.com/
YouTube:
http://www.youtube.com/channel/UCzQBt1XFCaFnCl5Bja8VJdQ
If you used any mods or special texture packs, you can include them in the package.
Choose a good, trustworthy site to upload your map package to. If you don't have a Minecraft forum account, don't bother- I used DropBox, which allows me to send the link to a specific file download to anyone I want.
Choose a good, trustworthy site to upload your map package to. If you don't have a Minecraft forum account, don't bother- I used DropBox, which allows me to send the link to a specific file download to anyone I want.
Conclusion
Making a Minecraft map is challenging and time-consuming; Minecraft really can be an art medium, and just like any other art medium, it won't be really easy. Be prepared to ask friends for help and take lots of screenshots, both before and during the building process. If you pay a lot of attention to detail and keep at it, you'll end up with a beautiful map that you can use for server games or just for others to download and enjoy.
Happy mining, Pirates!
